

I've been exploring the idea of making my own textures for some time now,
there are numerous ways to do it and I finally tried carving on to silicone.
I bought some nice silicone sheets (above) recently from CoolTools but before trying those....

I decided to use some silicone erasers I bought some time ago,
to get the hang of it before I start using the good ones.
Here's my first attempt (above) then I tried carving on the side (below).

I find it a little difficult to tell if they are any good until I put some clay on it.

Here are a couple of green unfired copper pieces,
I think this pattern I'm going to call Bamboo looks super cool on these feather shapes.

It looks really good on the shield shapes too.
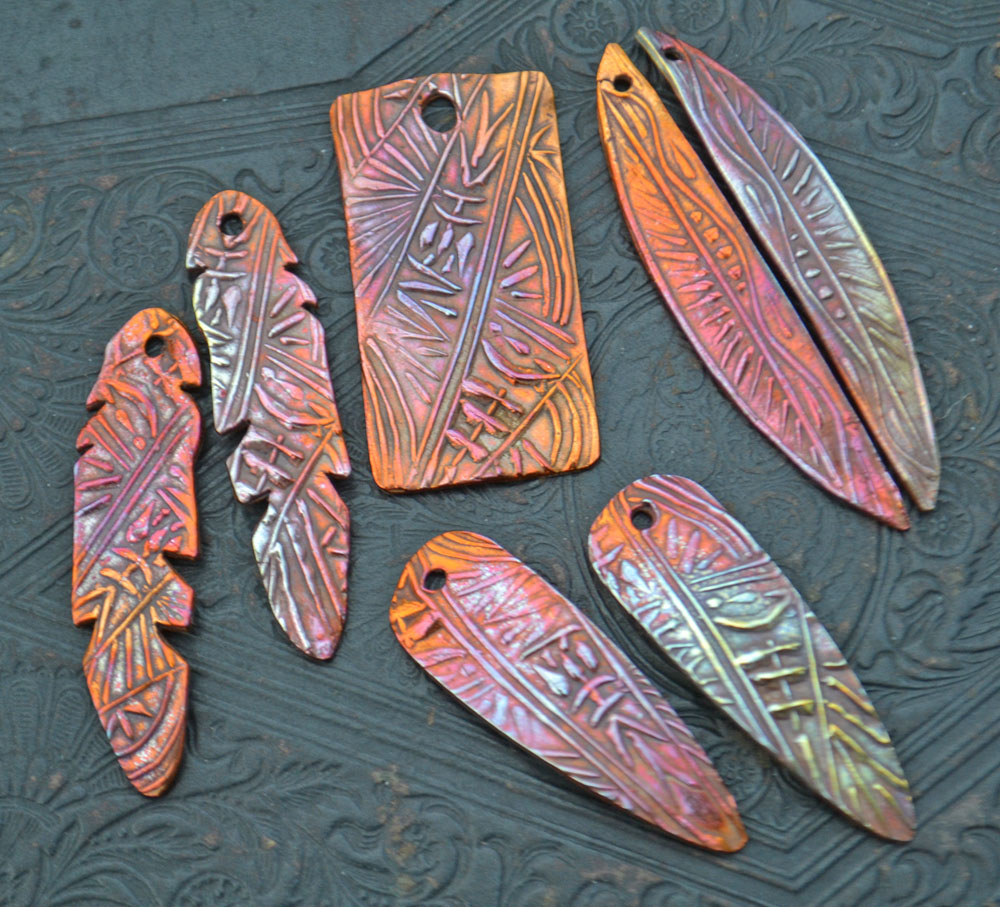
Here are all the pieces I made after they've been fired!
 |
| http://www.etsy.com/listing/88898346/handmade-copper-feather-bamboo-pair |
Oh ya, I love the feather with the Bamboo texture!!!!

These long lean ones came from the side of the eraser,
I used the texture to create the shape of them.

The Shield shape is also a really good one of this rustic texture!
I'm looking forward to playing some more with making my own textures.
Kristi
These look amazing Kristi! Love them!
ReplyDeleteAwesome!!! Have fun carving.
ReplyDeleteKristi...your work is evolving in leaps and bounds....just love the new designs! :-)))
ReplyDeletePlus now you know you can use the erasers for smaller textured pieces and save some money, especially when it comes to practicing different texture ideas :)
ReplyDeleteand yes LOVING the way it looks on the feathers!
Very nice! I'm inspired to try this myself.
ReplyDeleteVery nice! I'm inspired to try this myself.
ReplyDeleteI love carving!!!!! Beautiful work!
ReplyDeletethese are super, Kristi!! I especially like those long, thing half rounds. Excellent!
ReplyDeleteExcellent work, thanks for sharing your process with us.
ReplyDelete